A "mortise" is a precisely cut hole in a piece of wood, designed to fit a
corresponding "tenon" from another piece of wood, creating a strong joint
called a "mortise and tenon" - essentially, you would use a mortise to
securely connect two pieces of wood together, especially when you need a
strong, visually appealing joint, like in furniture construction.
Mortises include function, strength, and application.
Function:
"When we build, let us think that we build for ever." - John Ruskin
Mortise and tenon joints are considered one of the strongest wood joinery
methods due to their interlocking design.
Common applications:
This joint is frequently used in making furniture like chairs, tables, and
doors, where stability and a clean aesthetic are important.
How To Cut a Mortise
To cut a mortise, first accurately mark the mortise location and
dimensions on the wood using a combination square and mortise gauge, then
use a chisel and mallet to carefully remove the wood within the marked
lines, starting with a series of deep cuts along the mortise edges and
gradually working towards the center to avoid splintering; for deeper
mortises, consider pre-drilling holes with a large drill bit before
chiseling out the bulk of the material.
Layout and Mark the Mortise:
Position the workpiece: Secure the board where you want the mortise to
be cut on your workbench.
Measure and Mark
Use a combination square to mark the exact location and width of the
mortise on the edge of the board.
Set your mortise gauge to the desired depth of the mortise and scribe
lines along the edge of the board to mark the mortise thickness.
Square the lines across the board using a combination square to ensure
straight edges.
Pre Drilling (Optional):
Deep mortises: For deep mortises, use a large drill bit to drill a series
of holes along the marked mortise area, ensuring the holes are close
enough to almost connect.
Chiseling the Mortise:
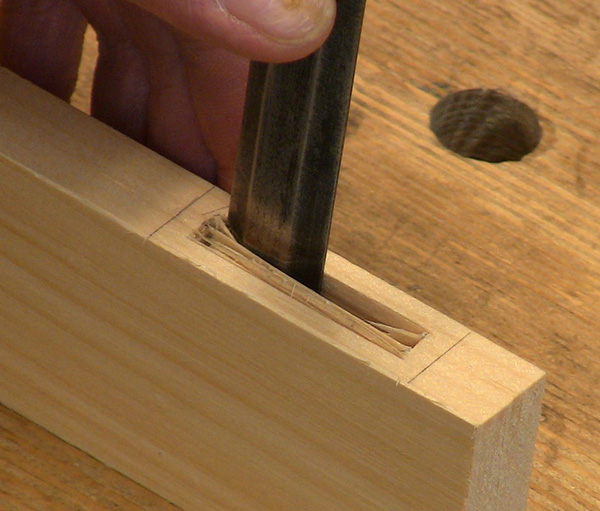
Chiseling wood from a mortise
Initial Cuts:With a sharp chisel, make deep cuts along the marked lines
on the edges of the mortise, creating a "V" shape. Be careful not to
chisel too deeply at the edges to prevent splintering.
Removing the Center:Gradually work your way towards the center of the
mortise, using a series of shallow cuts to remove the wood in layers.
Use a mallet to strike the chisel for more force when needed, ensuring
the chisel is positioned at a proper angle.
Cleaning up:Once the majority of the wood is removed, use a sharp chisel
to refine the edges of the mortise, ensuring it is square and smooth.
Important Considerations:Sharp tools: Always use sharp chisels to
prevent splintering and ensure clean cuts. Work with grain: When
chiseling, work with the wood grain to avoid tear-out. Test fit:
Regularly check the fit of the mortise with the tenon by dry fitting the
joint before final assembly.