Understanding Mortises & Tenons in Woodworking
A "mortise" is a precisely cut hole in a piece of wood, designed to fit a corresponding "tenon" from another piece of wood, creating a strong joint called a "mortise and tenon" - essentially, you would use a mortise to securely connect two pieces of wood together, especially when you need a strong, visually appealing joint, like in furniture construction.
Important aspects include function, strength, and application.
Function:
"When we build, let us think that we build for ever." - John Ruskin, From Front Porch Republic
The mortise acts as a socket that receives the tenon, which is the protruding piece of wood that fits into the hole.
Strength:
"Never half-ass two things, whole-ass one thing." - Ron Swanson, from goodreads
Mortise and tenon joints are considered one of the strongest wood joinery methods due to their interlocking design.
Common applications:
This joint is frequently used in making furniture like chairs, tables, and doors, where stability and a clean aesthetic are important.
How To Cut a Mortise...Visual Demonstration
To cut a mortise, first accurately mark the mortise location and dimensions on the wood using a combination square and mortise gauge, then use a chisel and mallet to carefully remove the wood within the marked lines, starting with a series of deep cuts along the mortise edges and gradually working towards the center to avoid splintering; for deeper mortises, consider pre-drilling holes with a large drill bit before chiseling out the bulk of the material.
Video Tutorial on Cutting a Mortise and Fitting Its Tenon
If you wish to embed this video in your website, copy and paste this code below.
<iframe
                    width="360"
                    height="202"
                    src="https://www.youtube.com/embed/aBodzmUGtdw?si=XH6tSBktmuJF9cit"
                    title="YouTube video player"
                    frameborder="0"
                    allow="accelerometer; autoplay; clipboard-write; encrypted-media; gyroscope; picture-in-picture; web-share"
                    referrerpolicy="strict-origin-when-cross-origin"
                    allowfullscreen></iframe>
How to Cut a Mortise...Step By Step
First, Mark the Mortise:
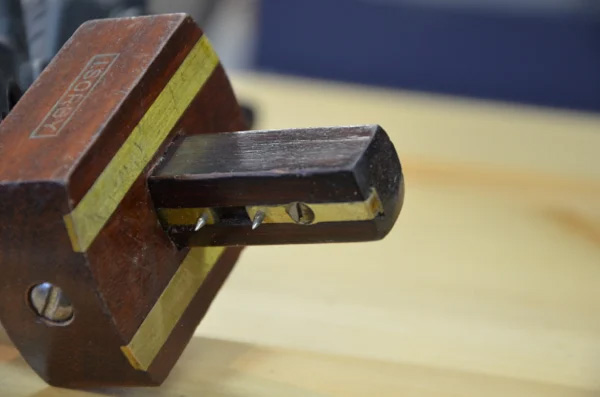
- Position the workpiece: Secure the board where you want the mortise to be cut on your workbench.
-
Measure and Mark:
- Use a combination square to mark the exact location and width of the mortise on the edge of the board.
-
Set your mortise gauge to the desired depth of the mortise and scribe lines along the edge of
the board to mark the mortise thickness.
" >registering along the same registration face just in case I'm off center or out of square...
- Square the lines across the board using a combination square to ensure straight edges.
Second, Pre-Drilling (Optional)
Deep mortises: For deep mortises, use a large drill bit to drill a series of holes along the marked mortise area, ensuring the holes are close enough to almost connect.
Finally, Chiselinging the Mortise
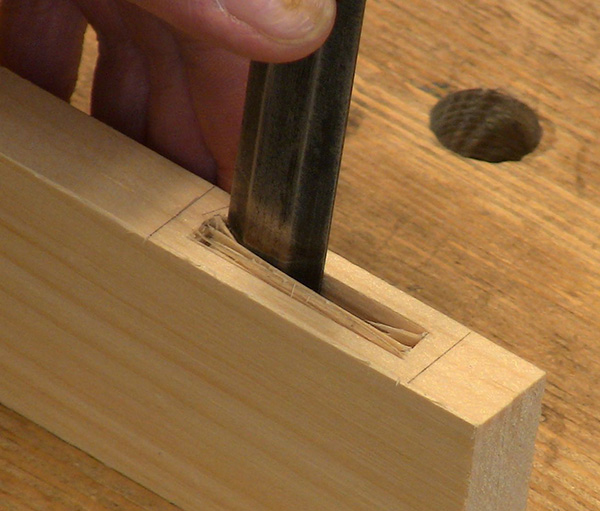
- Intial cuts: With a sharp chisel, make deep cuts along the marked lines on the edges of the mortise, creating a "V" shape. Be careful not to chisel too deeply at the edges to prevent splintering.
- Removing the center: Gradually work your way towards the center of the mortise, using a series of shallow cuts to remove the wood in layers. Use a mallet to strike the chisel for more force when needed, ensuring the chisel is positioned at a proper angle.
- Cleaning up: Once the majority of the wood is removed, use a sharp chisel to refine the edges of the mortise, ensuring it is square and smooth.
-
Important Considerations: Sharp tools: Always use sharp chisels to prevent splintering and ensure clean cuts. Work with grain: When chiseling, work with the wood grain to avoid tear-out. Test fit: Regularly check the fit of the mortise with the tenon by dry fitting the joint before final assembly.